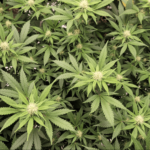
Homemade cannabis-infused oil is one of those kitchen projects that sounds intimidating until you actually do it. Then you realize it’s less complicated than making a good hollandaise sauce and infinitely more rewarding. Canna oil is the backbone of most cannabis edibles, from infused pasta dishes to salad dressings to baked goods, and once you understand the process, you’ll be making it with confidence every time.
I’m going to walk you through everything: the why behind each step, the temperatures that matter, the oils worth using, and how to actually dose your finished product without it being a complete guessing game. Let’s get into it.
Why Canna Oil Works (The Science, Briefly)
THC and other cannabinoids are fat-soluble, meaning they don’t dissolve well in water but bind beautifully to fats. That’s why oil (and butter) are the traditional vehicles for cannabis in edibles. When you infuse cannabis into oil, the cannabinoids transfer from the plant material into the fat, where they stay stable and bioavailable, ready to be absorbed through your digestive system when you eat something made with it.
According to NIDA’s cannabis research, ingested cannabis takes longer to take effect than inhaled cannabis (typically 30 minutes to 2 hours) but the effects tend to last longer and can feel more intense for some people. That’s not a reason to avoid edibles, it’s just a reason to be patient and start with a small dose.
Step One: Decarboxylation (Don’t Skip This)
This is the step that makes or breaks your canna oil, and it’s the one people most often skip or rush. Raw cannabis flower contains THCA, the acidic precursor to THC. THCA is not psychoactive. THC is. To convert THCA into THC (and CBDA into CBD), you need heat, specifically controlled, sustained heat over time. This process is called decarboxylation, or “decarbing.”
How to Decarb Your Flower
- Preheat your oven to 240-248°F (115-120°C). Use an oven thermometer if you have one, because home oven temperatures can be off by quite a bit.
- Break your flower into small pieces (not powder, just small chunks) and spread it in a single layer on a parchment-lined baking sheet.
- Bake for 30-40 minutes, stirring once halfway through.
- Watch for the color change: your flower should shift from bright green to a yellow-green or light brown. That color shift is your visual confirmation that decarboxylation is happening.
- Let it cool fully before handling or grinding.
Critical warning: Do not exceed 245°F (118°C) for your decarb or your infusion. Above that temperature, you start degrading cannabinoids and destroying terpenes, including the ones responsible for flavor and potentially therapeutic effects. More heat is not more effective, it’s actually counterproductive.
Choosing Your Carrier Oil
Almost any fat will work, but some work better than others for different reasons:
- Coconut oil: The most popular choice for a reason. High saturated fat content means excellent cannabinoid binding efficiency, and it’s solid at room temperature which makes it easy to measure and use. Refined coconut oil has a neutral flavor.
- Olive oil: Great option if you’re planning savory applications. Extra virgin olive oil adds its own flavor complexity, which can be wonderful or distracting depending on what you’re making.
- Avocado oil: High smoke point, neutral flavor, good fat profile. Works well if you plan to cook with your canna oil at higher temps.
- Hempseed oil: High in omega fatty acids, earthy flavor, lower smoke point. Better used in dressings or finishing applications rather than cooking. There’s a lovely poetry in using hempseed oil to infuse cannabis flower.
For a first batch, I’d recommend refined coconut oil or a neutral olive oil. They’re easy to work with and versatile in recipes.
What You’ll Need
- 3.5g of decarboxylated cannabis flower (roughly one eighth)
- 1/2 cup (approximately 115ml) of your chosen carrier oil
- Cheesecloth or a fine mesh strainer
- A slow cooker, double boiler, or small saucepan
- A thermometer (highly recommended)
- Optional: 1/2 teaspoon of sunflower lecithin per cup of oil (more on this below)
Three Cooking Methods
Method 1: Slow Cooker (Most Forgiving)
Add your oil and decarbed, coarsely ground flower to the slow cooker. Set it to the lowest heat setting possible. You want to maintain a temperature between 160-200°F for 4 to 6 hours, stirring occasionally. The advantage of this method is that it’s essentially hands-off and very difficult to overheat. The downside is it takes half a day. Perfect if you’re doing other things around the house.
Method 2: Double Boiler (Best Temperature Control)
Fill the bottom of a double boiler with a few inches of water and bring it to a gentle simmer. Add your oil and flower to the top pot. Maintain a water temperature of 160-200°F and let it infuse for 6 to 8 hours. This gives you the best temperature control of any method and essentially eliminates the risk of scorching. It does require more attention than a slow cooker.
Method 3: Stovetop (Fastest, Most Risky)
Combine oil and flower in a small, heavy-bottomed saucepan over very low heat. Maintain between 160-200°F and stir frequently for about 3 hours. This is the fastest method, but it requires constant attention. The moment you walk away and the temp creeps up, you risk scorching your oil and degrading your cannabinoids. If you have good temperature control on your stove and a reliable thermometer, this works. If not, use the slow cooker.
The Lecithin Secret
Here’s something the basic recipes often leave out: adding sunflower lecithin (or soy lecithin) to your infusion dramatically improves how efficiently cannabinoids bind to the oil. Lecithin is an emulsifier found naturally in many foods, and when added to canna oil, it helps the cannabinoids disperse more evenly and may improve bioavailability when you consume it. About 1/2 teaspoon per cup of oil is all you need. Just add it in when you combine your oil and flower.
Straining Your Oil
Once your infusion time is up, remove the pan from heat and let it cool slightly. Line a fine mesh strainer with cheesecloth (two layers is better) and set it over a bowl or measuring cup. Pour the oil through slowly, then gather the cheesecloth and gently squeeze out any remaining oil from the plant material.
Important: do not press or squeeze hard at first. Let gravity do the work. Aggressive squeezing can push chlorophyll and plant compounds into your oil that will make it taste bitter and green. A gentle press at the very end is fine.
Discard the spent plant material (or add it to a compost bin, some people use it in dog treats, but that’s a whole separate discussion and please consult a vet first).
Understanding Potency
This is where honesty matters most. Homemade canna oil is not precisely dosed, and that’s just the reality of home kitchen infusion. That said, you can get a reasonable estimate.
Using 3.5g of flower with 20% THC content as a baseline:
- 3.5g x 0.20 = 0.7g = 700mg of THC in the plant material
- Oil retains roughly 60% of the plant’s cannabinoid content through the infusion process
- 700mg x 0.60 = approximately 420mg of THC in your finished oil
- If you made 1/2 cup (approximately 24 teaspoons) of oil, that’s roughly 17-18mg per teaspoon
As the FDA notes in its cannabis consumer guidance, starting with a low dose and increasing gradually is the safest approach, especially for edibles where effects can take significantly longer to kick in than inhaled cannabis. I can’t stress this enough: start with 5-10mg, wait a full two hours before deciding whether to take more.
Canna Oil for Wellness Applications
Beyond cooking, canna oil has applications worth exploring for those using cannabis for specific wellness purposes. For people exploring cannabis for pain management, an infused oil can be used topically (applied directly to the skin over a sore muscle or joint) as well as internally. Some people prefer this dual-use approach.
The specific terpenes and cannabinoids present in your flower will influence the effects you experience. If you’re choosing flower with specific wellness goals in mind, looking at terpene profiles can help you select strains that align with what you’re looking for, whether that’s terpenes for pain relief or compounds associated with relaxation and sleep.
Storage: Making It Last
Properly made and stored canna oil has a shelf life of 12 to 18 months. Here’s how to get the most out of it:
- Store in an airtight container, ideally glass. Mason jars work perfectly.
- Keep it in a cool, dark location. A pantry or cupboard away from the stove is ideal.
- For longer shelf life, especially with olive oil-based infusions, refrigerate.
- Avoid exposing it to light, heat, or air more than necessary. These are the enemies of cannabinoid stability.
- Label your containers with the date made and your potency estimate. Future you will thank present you.
Common Mistakes to Avoid
- Skipping the decarb: Your oil will be nearly inert without it.
- Too much heat during infusion: Stay below 245°F, always.
- Grinding too fine: A fine grind makes straining harder and pushes more plant material into your oil. Coarse grind is better.
- Squeezing the cheesecloth too hard: Adds bitter plant flavor.
- Dosing too high too early: The classic edible mistake. Start low, go slow, and be patient.
- Using old or poorly stored flower: Degraded cannabis makes degraded oil. Start with quality flower.
Putting Your Canna Oil to Use
Once you have a batch of well-made canna oil, the options are genuinely exciting. You can use it:
- In any recipe that calls for oil or melted butter
- Drizzled over pasta, roasted vegetables, or pizza after cooking
- In salad dressings and marinades
- Blended into smoothies (coconut-based oil works especially well here)
- As a base for homemade topicals and balms
- In capsule form for precise (well, relatively precise) dosing
The key when cooking with canna oil is to add it after removing food from high heat whenever possible. Sustained cooking temperatures can still degrade cannabinoids even in the finished oil. Use it as a finishing oil when you can.
Final Thoughts
Honestly, making canna oil at home gives you a level of control over your cannabis experience that you just can’t get from store-bought products. You know what went into it, you chose the flower, you controlled the temperature, you did the process. There’s something genuinely satisfying about that.
I think the most important thing to take away from this is: decarb properly, keep your heat low and consistent during infusion, and dose conservatively when you use it. Get those three things right and you’ll have a product you’re proud of and, more importantly, that you can use safely and enjoyably.
Start with a small batch like this one to get your process dialed in. Once you’re confident in your technique, you can scale up, experiment with different oils, and start getting creative in the kitchen. The learning curve is genuinely short, and the rewards are very real.